Upload one image, choose a new setting, and protect the subject, fine edges, lighting, and crop while the background changes.
AI Background Changer working editor
Image Generator
Upload the photo whose background you want to replace(0/1)
481 / 2000
Cost 4 creditsRemaining 0 credits
Preview
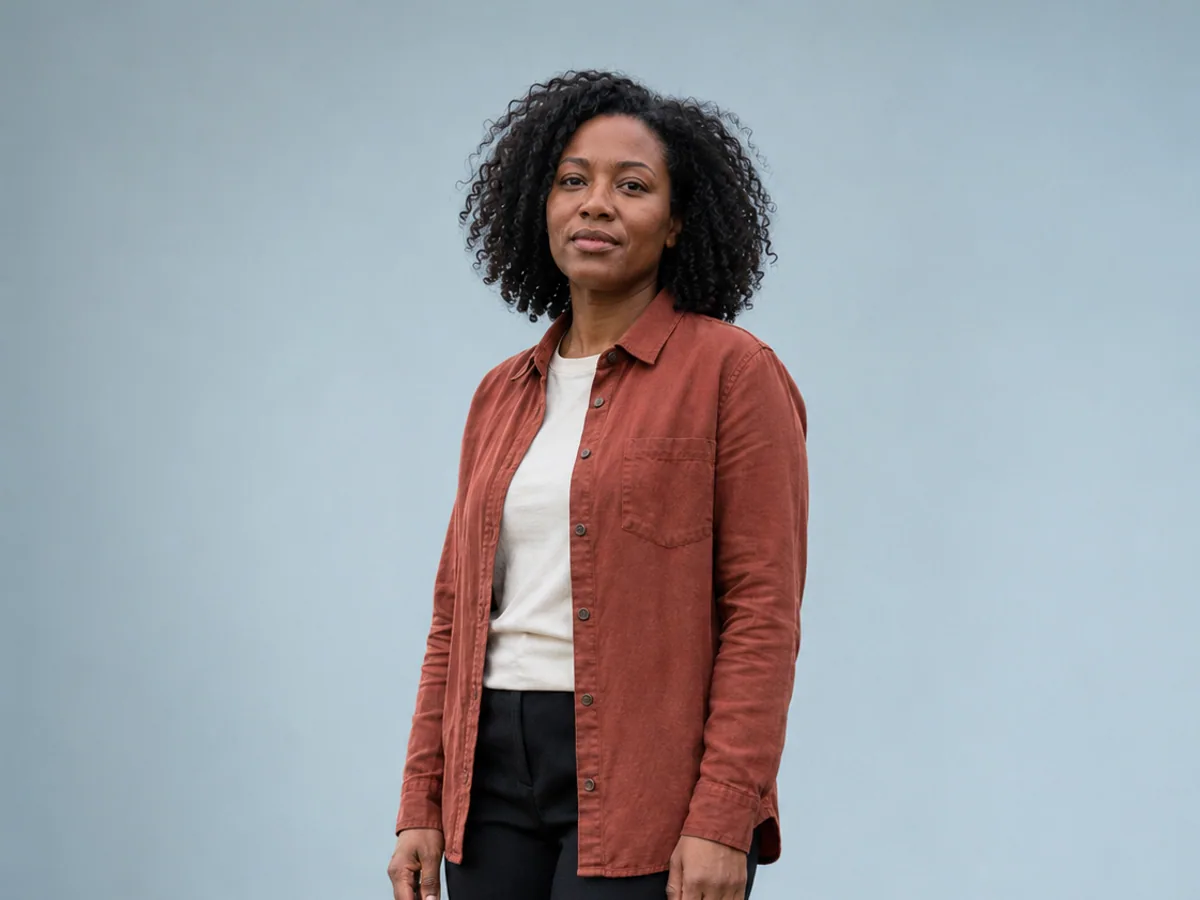
After · illustrative edited scene
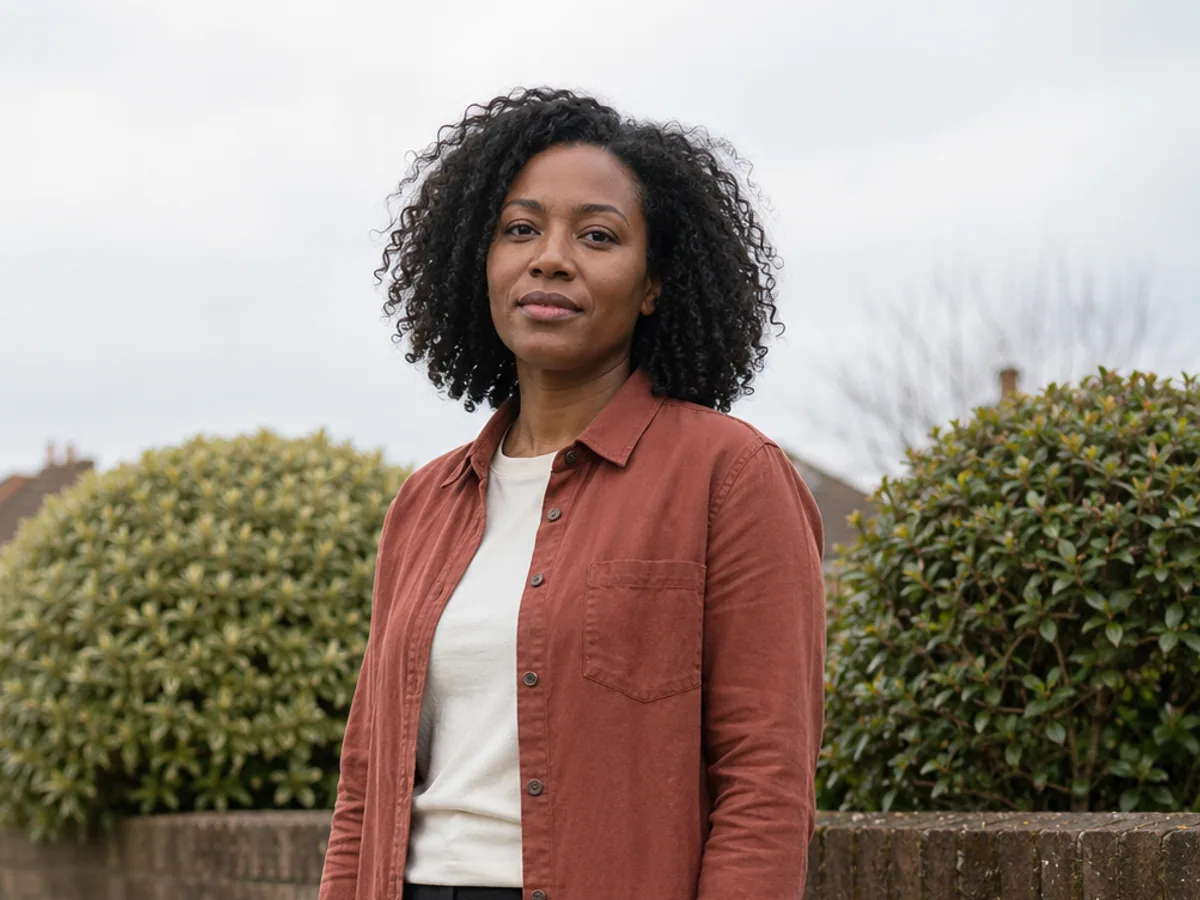
Before · source
One requested change
Brick wall → pale blue studio
A focused portrait background replacement
Single Edit or Multi FusionPreset clicks never generateReview edges before download
Refine the task
Tell the Editor What the New Scene Must Preserve
The scene selected in the tool is only the starting point. Use these controls to align its light with the source and name the details that should remain recognizable. Protection instructions improve focus but do not pixel-lock the subject, so compare every result with the uploaded image.
Prompt assembled from your task setup
Replace only the background with a restrained blue-gray editorial studio with a seamless floor sweep and open negative space. Match the original light direction, exposure, color temperature, and shadow softness. Keep the main subject, identity, pose, clothing, and proportions, hair, transparent details, product contours, and other fine edges, the camera angle, focal length, crop, and subject scale as close to the source as possible. Do not add text, logos, or a second subject.
Single Edit and Multi Fusion modes Scene controls become prompt instructions Generation never starts from a preset click Review edges and non-target areas before download
Before and after
Three Background Tasks, Each with a Different Risk
A useful example should make the requested change and the protected details easy to inspect. Use these labeled illustrative previews to compare subject edges, lighting, shadows, crop, and scene continuity before you download a result.
01
Portrait background replacement
Move a portrait into a controlled studio
Use a portrait with visible hair, shoulders, hands, and floor contact so the result can be checked rather than merely admired. The requested change is the room behind the person; face, pose, clothing, scale, and camera position should remain recognizable. Fine hair against a similarly colored wall is a useful stress test, and it may need a second pass when the boundary becomes soft.
Before · illustrative source
After · illustrative edit
02
White product background
Prepare a clean listing image without flattening the object
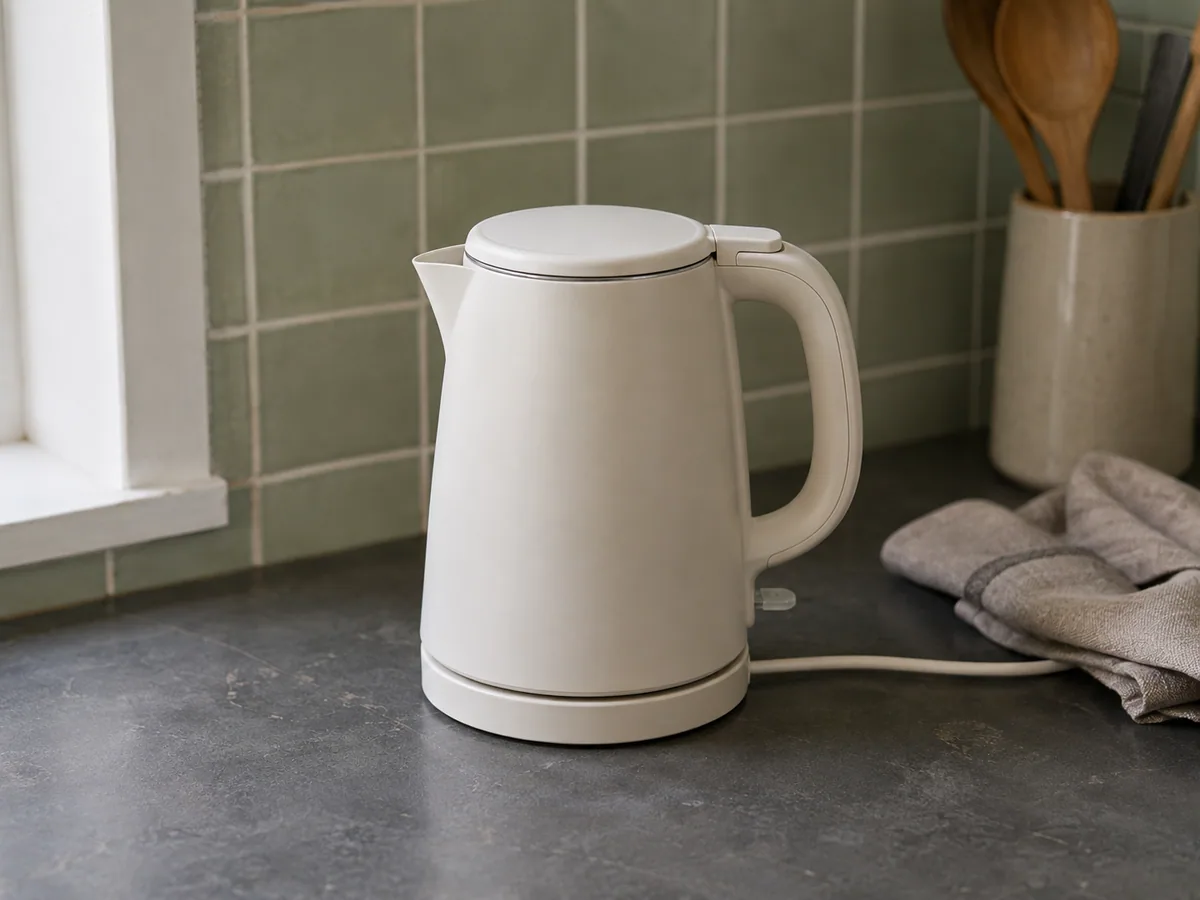
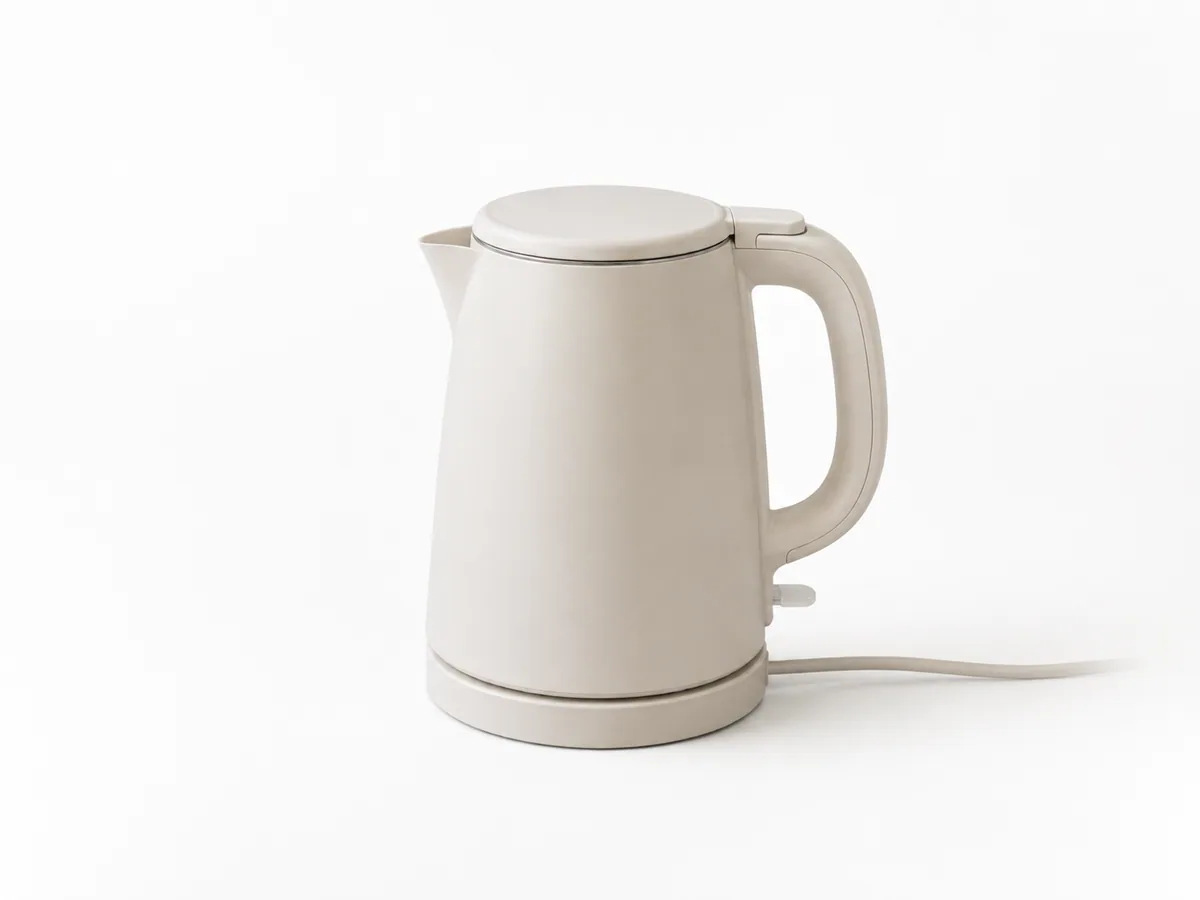
A white background is useful only when the product still feels grounded. Keep the kettle body, handle, spout, switch, cable, texture, and camera angle, then ask for a restrained contact shadow instead of a floating cutout. Pale products on white are difficult because their edge contrast is low, so inspect the handle opening and the boundary where the base meets the surface.
Before · illustrative source
After · illustrative edit
03
Lifestyle product setting
Place a product in context while keeping it reviewable
A lifestyle scene can add context, but it also gives the model more opportunities to alter the product. Describe one location, one light source, and the supporting objects that matter. After generation, compare the keyboard frame, key layout, cable, control knob, and underglow with the source. If those details drift, simplify the setting or protect them explicitly in the next prompt.
Before · illustrative source
After · illustrative edit
What to inspect
A Better Background Still Has to Fit the Original Photo
Background replacement is not finished when the old room disappears. The subject edge, camera geometry, new light, and surface contact need to agree. Use these checks after every result, especially when the source includes loose hair, reflective objects, pale products, narrow gaps, or a full-length person touching the floor.
01
Check the subject boundary at full size
Zoom into hair, shoulders, transparent packaging, cables, handles, and narrow gaps. These areas reveal whether the new background has leaked into the subject or erased important edge detail. A clean thumbnail is not enough evidence; compare the generated file with the source before using it in a listing or profile.
02
Compare light direction and contact shadows
The background should not suggest a window on the left while the subject remains lit from the right. Look at highlights, cast shadows, floor contact, and color temperature together. When they disagree, keep the chosen scene but revise the lighting instruction instead of replacing several parts of the prompt at once.
03
Protect crop, scale, and camera position
A background edit can feel wrong even when the edges are clean if the person becomes taller, the product shifts in frame, or the perspective changes. Ask the editor to retain crop, focal length, camera height, and subject scale. For products, keep enough floor or surface beneath the object to support a believable shadow.
04
Refine one problem in the next pass
When the first result is close, name the remaining problem instead of rewriting the full scene. You might ask to restore flyaway hair, soften a contact shadow, reduce background detail, or return the original crop. Focused revisions make it easier to understand which instruction improved the image and which one introduced drift.
How it works
How to Change an Image Background with AI
Keep the first attempt easy to judge. Start from one source, choose one setting, and identify what cannot change. After generation, refine the weakest boundary or lighting mismatch instead of asking for a completely different image.
01
Upload one clear portrait or product image
Choose a JPG, PNG, or WebP image where the main subject is large enough to inspect. Visible hair, shoulders, hands, product contours, cables, handles, and floor contact make it easier to judge whether the requested edit kept the right details.
02
Choose a scene and decide how its light should behave
Start with a studio, pure white, office, outdoor, or warm interior direction. Match the source light when preservation matters, or request one new lighting condition and keep it consistent across the background, subject edge, and contact shadow.
03
Name the subject details that should remain recognizable
Use the protection controls or edit the assembled prompt. For a portrait, specify face, hair, pose, clothing, proportions, crop, and camera angle. For a product, specify shape, material, labels, openings, cables, scale, and surface contact.
04
Generate, compare, and revise the weakest area
Compare the complete result with the source instead of checking only the new scene. If the background works but one edge, shadow, or crop drifts, keep the useful instructions and revise that single problem in the next pass.
Choose the right workflow
Background Changes for Portraits, Products, and Campaign Images
The same image background changer can serve different jobs, but the prompt should reflect what matters in each one. A portrait depends on identity and hair boundaries, a product depends on shape and material, and campaign work depends on repeatable framing across a set.
01
Product listings and catalog images
Replace a distracting room with pure white, a restrained studio, or one lifestyle setting. Preserve product geometry, color, material, labels, small openings, cables, and camera angle. Pale or transparent objects need extra edge review, and every result should retain a believable contact shadow rather than appearing to float.
02
Professional portraits and profile photos
Move a person into an office, studio, or outdoor location while asking the editor to keep identity, expression, hair, pose, clothing, hands, body proportions, and crop. Full-length portraits also need consistent floor contact and shadows; loose hair and arm overlap are common areas to inspect closely.
03
Campaign and social variations
Create several scene directions around one approved source without rebuilding the product or portrait from scratch. Keep framing and protection language stable across the set, then vary one setting or light direction at a time. Review each output independently because consistency is requested, not guaranteed.
FAQ
AI Background Changer Questions
These answers describe the current prompt-based workflow and its limits. They do not promise pixel-identical preservation or a successful edge on every source image.
Upload only images you have permission to edit.
How do I change a photo background with AI?+
Upload one portrait or product image, choose a background direction, and describe the details that should remain recognizable. The page assembles those choices into a prompt for the image editor. Generate once, compare the entire result with the source, and refine the weakest edge, light, shadow, or framing issue rather than changing several instructions at once.
Is the AI background changer free?+
An eligible free trial is shown inside the editor when it is available for the selected model and settings. Other models and higher resolutions use credits. The editor displays the current model, generation cost, remaining trial or credit state, and any unlock step before a generation starts.
Can I create a white background for a product photo?+
Yes. Choose the Pure white direction and ask for a soft natural contact shadow beneath the product. In the protection list or prompt, name the shape, material, labels, handles, cables, openings, camera angle, and scale that should remain. Pale and transparent products need a close edge check because they have less contrast against white.
Will the person or product stay exactly unchanged?+
No generative edit should be treated as pixel-locked preservation. You can ask the model to retain identity, pose, clothing, proportions, product geometry, labels, crop, and camera angle, but results vary. Compare the source and result at full size, especially around faces, hair, hands, text, reflective materials, transparent areas, and narrow gaps.
What source images are easiest to edit?+
Use a clear image where the subject is large enough to inspect and its important boundaries are visible. Portraits benefit from visible hair, shoulders, hands, and floor contact. Products benefit from clear contours, readable labels, visible handles or cables, and a surface beneath the object. Crowded backgrounds and low-contrast edges can require more refinement.
How should I describe a realistic new background?+
Name one location, the amount of detail, the surface beneath the subject, and the light direction. For example, request a softly focused office with window light from the left and a restrained depth of field. Then list the subject details, crop, camera angle, and contact shadow that should remain consistent with the source.
Can I use a generated background for commercial work?+
Commercial use depends on the rights attached to the source image, any people, products, brands, artwork, and references it contains, as well as the current Terms of Service. Upload only material you have permission to edit, review the final result for unintended marks or protected content, and confirm the applicable terms before publishing it in a listing or campaign.
Replace the Background. Keep the Photo Recognizable.
Choose a scene, match its light to the source, and tell the editor which details deserve protection. Generation begins only after you upload an image and confirm the prompt in the workspace.